Azure Pipelines- Continuously Build, Test and Deploy to Any Platform and Cloud
In software engineering, Continuous Integration (CI) is the practice of merging all developer working copies to a shared mainline, several times a day. CI can be done using different tools such as Azure Pipelines, Jenkins, TeamCity, GitLab CI, Codeship etc. Here, we discuss in the context of Azure Pipelines.
Azure Pipelines is used to continuously build, test and deploy to any platform and cloud. We can automate our builds and deployments with Pipelines.
The Main Features of Azure Pipelines
1. Works with any language and platform
Azure Pipelines is the Continuous Integration and Continuous Delivery (CI/CD) solution for any language, application, or platform. We can build, test and deploy Node.js, Python, Java, PHP, Ruby, C/C++, .NET, Android and iOS apps. It also runs in parallel on Linux, macOS and Windows.
2. Containers and Kubernetes
Azure Pipelines helps you to easily build and push images to container registries like Docker Hub and Azure Container Registry. It deploys containers to individual hosts or Kubernetes.
3. Extensible
We can explore and implement a wide range of community-built build, test, and deployment tasks, along with hundreds of extensions from Slack to SonarCloud.
4. Deploy to any cloud
Implement Continuous Delivery of your software to any cloud, including Azure, AWS and GCP. it also enables you to visualise deployment to any number of interdependent stages.
5. Advanced workflows and features
We can take advantage of easy build chaining and multi-phased builds. It supports YAML, test integration, release gates and reporting.
For working with CI and Azure Pipelines, we use Visual Studio Online which is now called Azure Devops. This is a proprietary tool from Microsoft Corporation.
To configure the continuous build, we should have a Microsoft Live ID. We need to log in with this ID to the Azure portal and create a project. This will create the DevOps azure pipeline environment for your project.
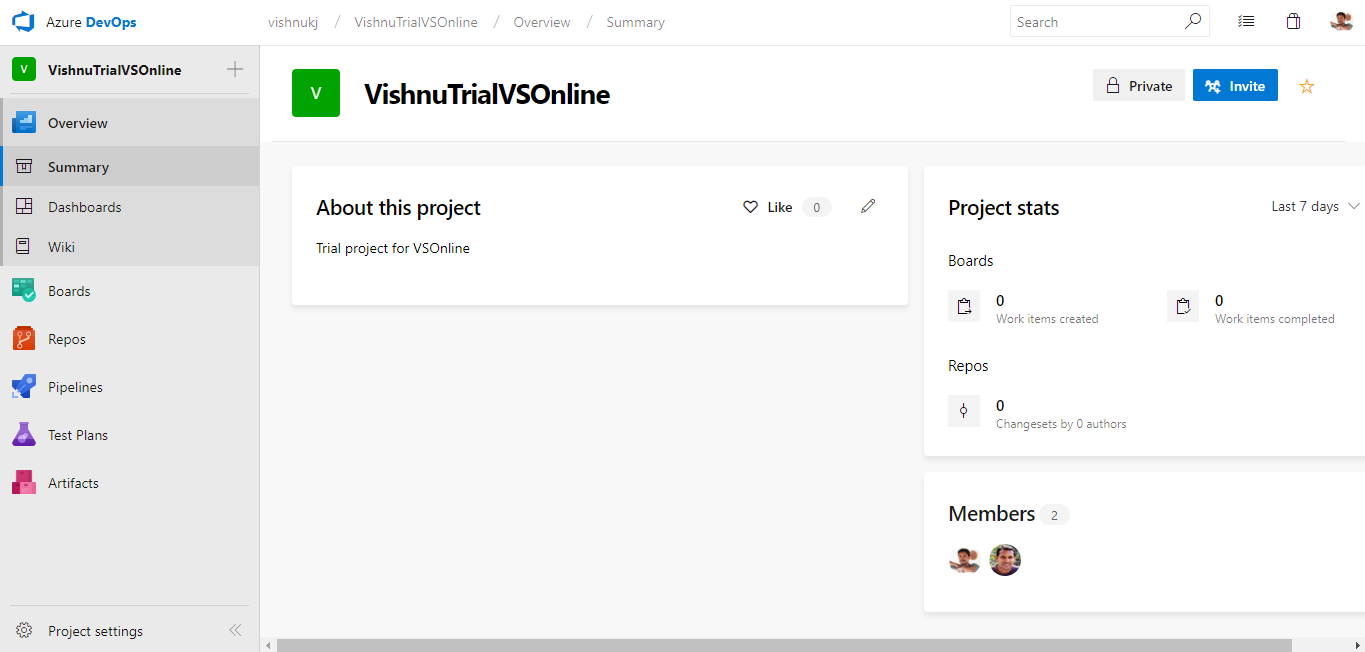
On the left menu click Pipelines and on the pipelines window and click “New Pipeline” button
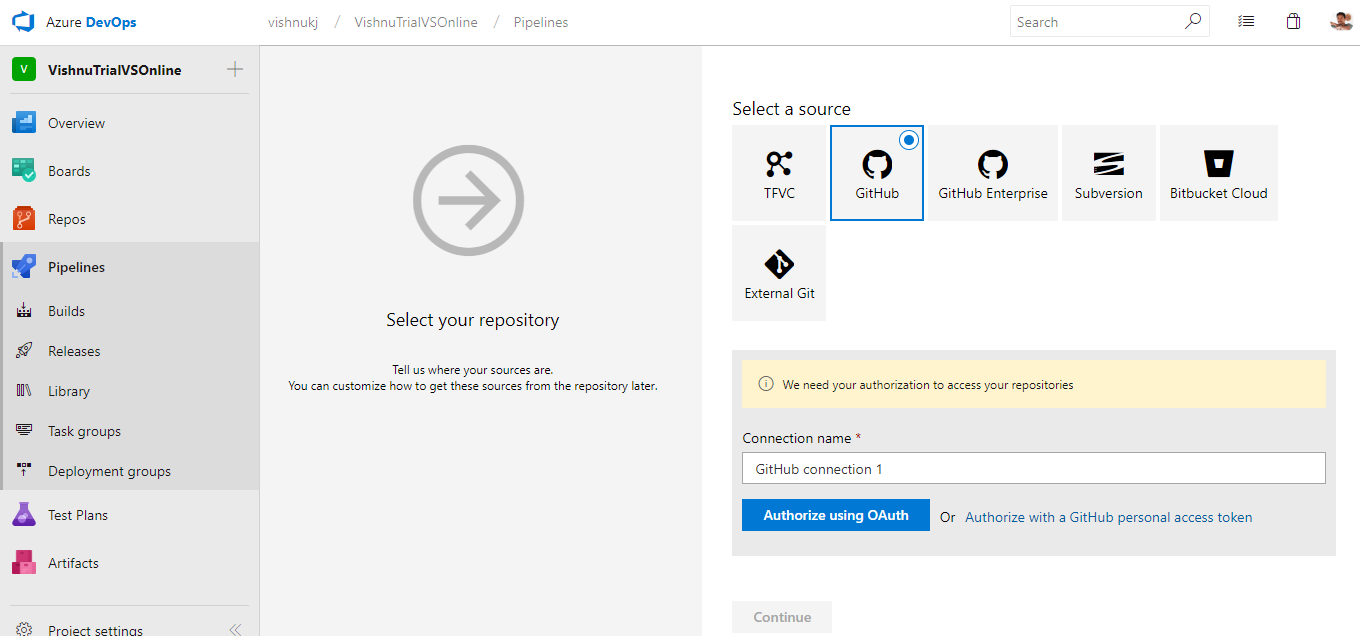
There you need to select the source where your project is located. Also, you need to select the default branch in the repo.
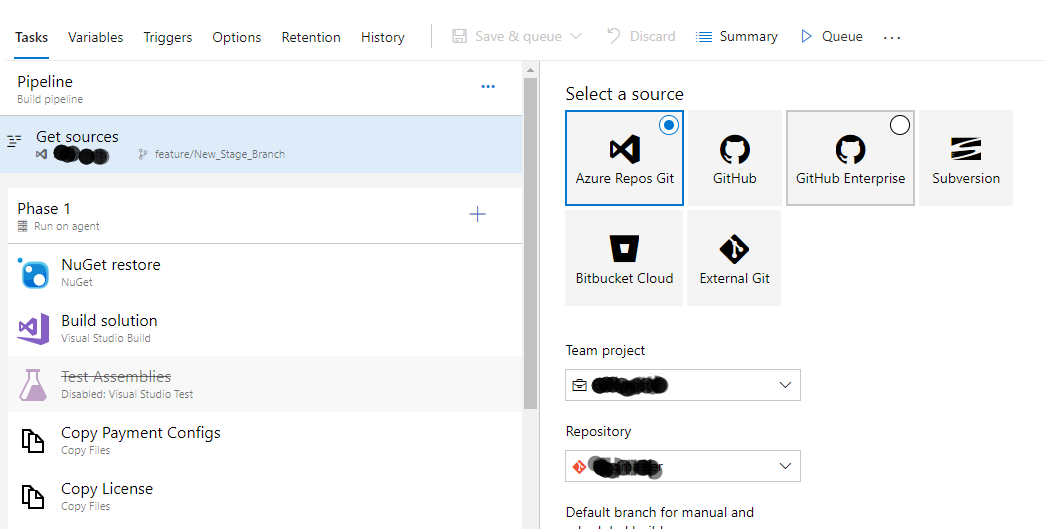
You can add different build steps as NuGet restore, Visual Studio Build, Visual Studio Test, Copy Files etc. based on how you want to build your project and release it to different environments like stage, production etc.
Now on the left menu, click Releases.
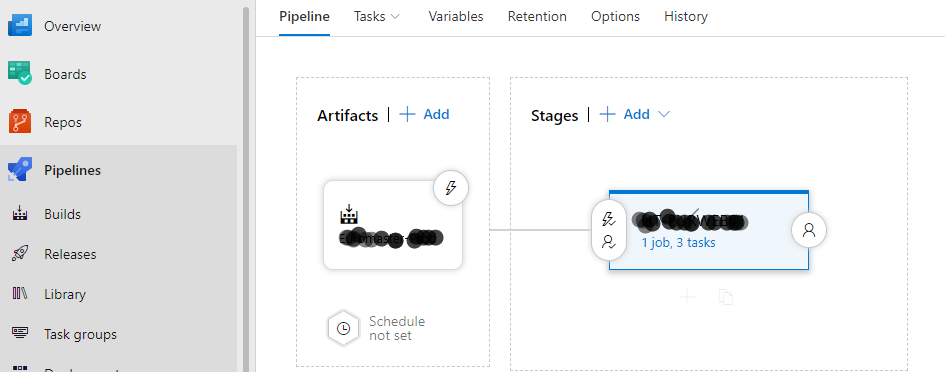
We can see the build we create in artifacts and under stages, you can add Release task with Pre-deployment conditions if any. Pre-deployment conditions are conditions such as, approval of specific uses to deploy the changes to the server.
On the task tab, you have the option to set the release like in the image below.
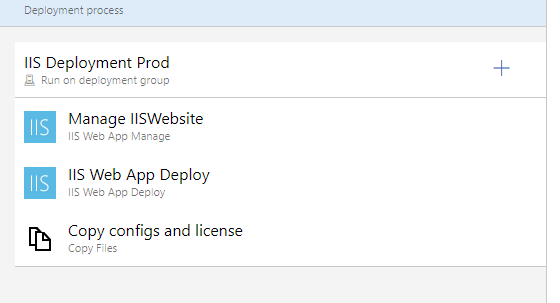
You can enable Continuous Integration in the triggers tab

Also, you can specify connection strings and other global variables specific to the environment in the variables tab.
After setting these settings, you need to save the configuration. Once it is done, you can start testing it by queuing a new build.


